Nearly every camper renovation that goes badly went badly for the same reason: the work started with the parts you can see.
The correct first job is unglamorous and costs nothing. Find out whether water has been getting in, and if so where and for how long. Everything else in the project depends on that answer, and it is the one thing that becomes drastically more expensive to discover later, once it is behind your new wall panels.
Start outside, on the roof
Water almost never enters where the stain appears. It enters somewhere above and travels.
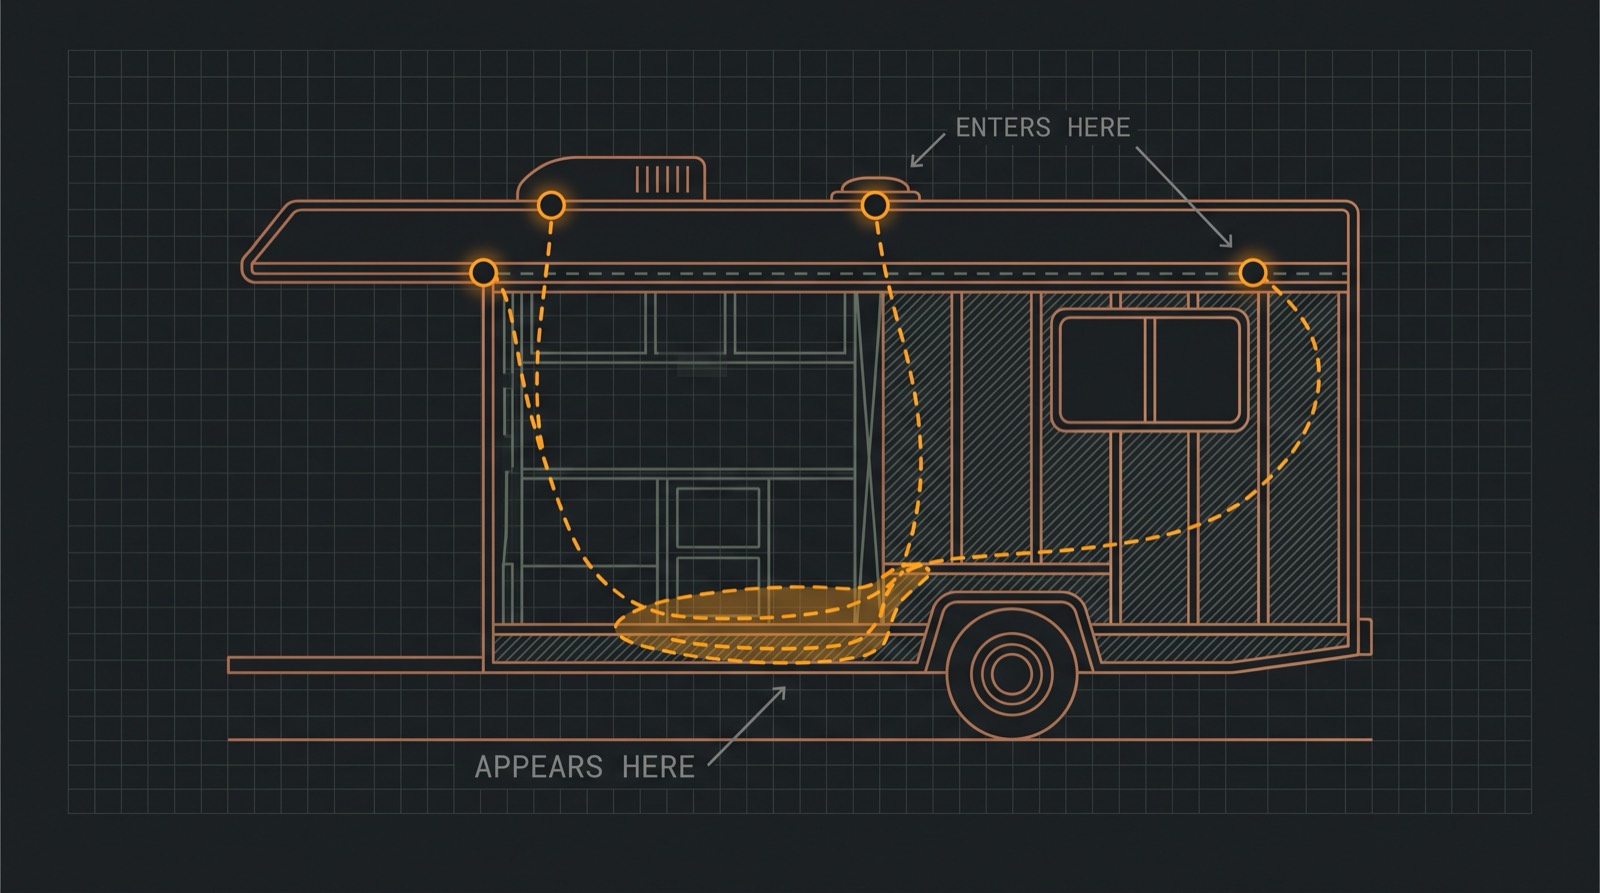
Go over the roof for cracks, punctures and seals that have gone hard, split or lifted, paying particular attention to every penetration: vents, aerials, air conditioner, solar mounts, and the seam where the roof meets the sidewall. Then the windows and door, looking for gaps or perished sealant.
On the sidewalls, look along the panel at a shallow angle in good light. Bubbling or a gentle rippling is delamination, where the outer skin has separated from its substrate because moisture got between them. It is a serious finding and it is much easier to see from an angle than face-on.
Then inside, with your hands and your nose
Walk the whole floor slowly, including in the corners and along the walls, and feel for sag or sponginess. Soft floor means rot in the subfloor.
Run your hand over the walls and ceiling rather than just looking. Warping, ripples and irregularity that you can feel but not quite see are the early version of what later becomes an obvious stain.
Then open everything. Lift the rugs. Look inside every storage compartment, especially the ones nobody uses. Flip the mattress and look at both sides. Smell the curtains and the soft furnishings, because they hold mould long before anything looks wrong.
A musty smell in a closed-up camper is not “how they smell”. It is information.
The finding that changes the project
Poke any framing you can reach where you suspect water has been. Sound timber is hard. If it gives, if it feels spongy, if a screwdriver goes in easily, the damage is not local. Framing rots after everything around it has already been wet for a long time.
That finding does not necessarily mean walk away. It does mean the project is now a structural repair with a renovation on the end of it, and the honest thing to do is reprice it before ordering fabric samples.
If you are still deciding whether to buy, this is the point to pay for a professional inspection. A certified inspector with a moisture meter and a thermal camera will find in an hour what you would find in a month of disassembly.
The order of work
Once you know the vehicle is sound, or once you have made it sound, the sequence is largely dictated by what buries what.
- Water ingress, sealed and proven. Not just repaired: repaired and then tested with a hose, from the top down.
- Structure and subfloor. Anything soft comes out now.
- Anything that lives inside a wall or under a floor. Insulation, wiring runs, plumbing, ducting. Everything you would have to demolish to reach later.
- Walls, ceiling, floor. The surfaces that cover the layer above.
- Cabinetry and furniture.
- Paint, textiles, trim, the parts that appear in photographs.
The temptation is always to jump to step six, because it is the part that feels like progress. Doing so means removing it again when step three turns out to have been necessary.
Two things worth deciding early
What you are actually building. A camper you will use four weekends a year justifies different decisions to one you will live in. Most over-specified renovations come from not answering this.
What it weighs. Every panel, every litre of water, every sheet of plywood comes off your cargo capacity, which is the gross vehicle weight rating minus the unloaded weight. It is easy to add a few hundred kilograms in materials during a renovation without ever weighing anything, and to end up with a vehicle that is technically overloaded before you pack a single bag.
Where the rest of this goes
Once the vehicle is dry and sound, the practical guides pick up: flooring once you know the subfloor is good, cabinet doors if the carcasses survived, and painting cabinets if they only need a finish rather than replacement.
For the electrical side, the battery bank calculator and DC wire size calculator will size the parts of step three that are easiest to get wrong and hardest to reach afterwards.